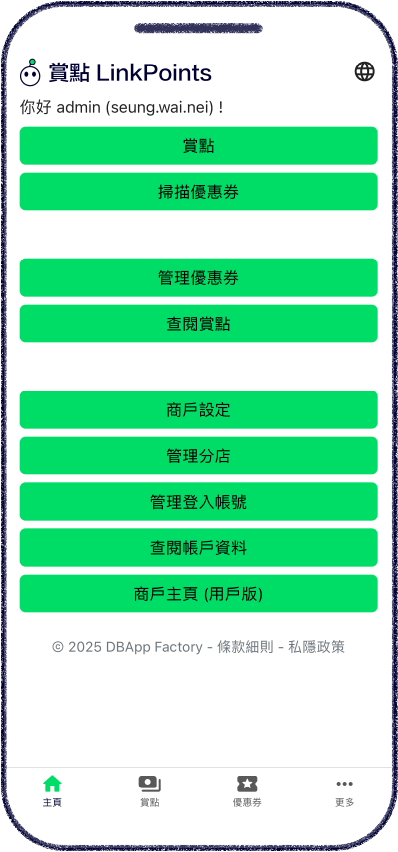
賞點 LinkPoints Business zone is a zone for participating merchants to manage LinkPoints, coupons and merchant settings.
Merchants are welcome to contact us for more information.
LinkPoints are exclusive to each merchant, that is, LinkPoints earned at your store can only be redeemed for coupons offered by you.
Navigate to the Add LinkPoints page, enter spending amount, scan User ID QR code, click Create to add LinkPoints to the user. The number of LinkPoints will be automatically calculated based on Amount per point in Merchant settings.

Navigate to the LinkPoints page, LinkPoints create records in the past three months are listed.
Admin accounts can navigate to the All history and Report tabs.
Click the All history tab, view LinkPoints create records of all login accounts in the past three months.
Click the Report tab, view the statistics report within 24 hours, 7 days or 30 days.

Navigate to the Coupons page, all coupons are listed. If the coupon has not been published, it will be marked as a draft.
Click the Preview button to preview the coupon (User mode).
Click the Report button to view the statistics report within 24 hours, 7 days or 30 days.

Navigate to the Coupons page, click Create to navigate to the Create coupon page, enter name and other coupon details.
Click Create draft to save it as a draft, and update it later.
Click Publish to publish the coupon for users to redeem.
Navigate to the Coupons page, click a coupon to navigate to the Update coupon page, update name and other coupon details, click Update to update the coupon.
Click Publish or Pause to update the coupon publishing status.
Click Delete to delete the coupon. Please note that report for the coupon will no longer be available after deletion.

Navigate to the Scan coupon page, scan User coupon QR code to redeem the User coupon.

Navigate to the Merchant settings page, update name and other merchant details, click Update to update the merchant settings.
New participating merchant will be in the Ready state when the account is created. After completing Merchant settings and Coupon settings, click Launch now to update the state, and users will be able to search for it.

Navigate to the Shops page, all shops are listed.
Click Create to navigate to the Create shop page, enter district and other shop details, click Create to create a shop.
Click a shop to navigate to the Update shop page, enter district and other shop details, click Update to update the shop.
Click Delete to delete a shop.

Navigate to the Account details page, view Merchant account details.

Click Merchant page (User mode) to view Merchant page (User mode).

Navigate to the Login accounts page, all login accounts are listed, along with the corresponding role.
Click Create to navigate to the Create account page, enter username and other account details, click Create to create an account.
Click an account to navigate to the Update account page, enter username and other account details, click Update to update the account. Locked accounts (such as super admin) and logged-in accounts cannot be updated.
Click Delete to delete an account.

Admin: All features are available.
Staff: Only features Add LinkPoints, Scan coupon, and View LinkPoints are available.
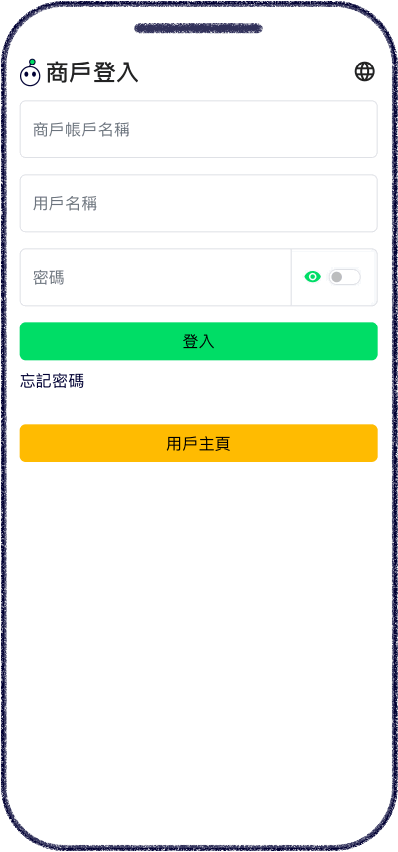
Navigate to the Update password page, enter existing password and new password, click Update to update password.
Navigate to the Merchant login page, click Forgot password, enter account name and username, click Confirm, enter the received verification code and new password, and click Reset to reset password.
Navigate to the More page, click User Home to return to the User Home.
